The following list covers the basic language we use for mobility:
Arc width
The cane covering their body width, not too narrow and not too wide. The cane should come out to their shoulder left and right.
Scanning
Moving the cane left and right.
Red-striped cane
Red stripes on a cane tell the public that the person has a sight impairment and a hearing impairment.
Symbol cane
Much shorter and offers no protection against the environment. Shows the public that you have a sight impairment. Used by people with more residual vision left.
Guide cane
Longer than a symbol cane and offers basic protection against the environment. It is familiar with the public, who will know you are sight impaired.
Long cane
This is the longest cane that meets the ground with a tip – either a rolling tip or pointed tip. Rolling tips are great for rolling over smooth surfaces when you’re scanning the ground. Pointed tips are used when tapping the ground as you scan.
Help position
Hands on top of the cane signalling they need assistance.
Walking in step
Ensuring the cane is moving in time with their footsteps but not to worry about the cane to the left and the leading foot to the right.
Inner shore line
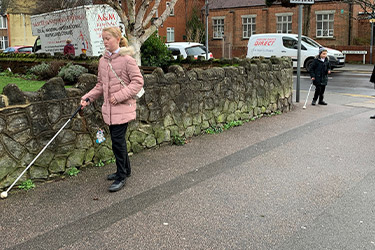
Following the inner side of the pavement, possibly with a wall or grass verge. Children are taught from an early age to use the inner shore line, as it’s safer.
It’s important for parents to continue practising mobility skills at home with their child in order to build their confidence and develop their independence skills.
Nicola, Children’s Worker
Long cane mobility skills for younger children
Choose a quiet time of the day and stay close to home. A simple route up and down the pavement outside your house is ideal.
Let’s start off by holding the cane correctly.
The child should start off by holding their cane out in front of them
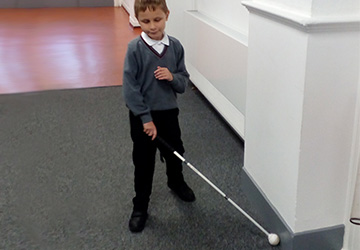
They should pay attention to their hand position. Their index finger should be placed on the flat edge of the handle, with their hand in the middle of their body – by their belly button.
Next prepare to walk forward.
Whilst standing still, they should scan left and right, making sure that their scan covers their body width evenly and that it comes to their shoulder line.
Now walk forward.
For now, to keep things simple, encourage the child to walk forward, scanning and following the inner shoreline (of the pavement, possibly with a wall or grass verge). They can walk up and down their road a couple of times just practising this skill. If there is no line to follow, talk to them and let them follow your voice.
If they live in a quiet area and they’ve walked up and down the pavement, you could include a simple road crossing.
Ask them to locate the kerb edge to their left or right, the cane will then drop down the kerb edge.
Then they can line themselves up to the kerb edge, take one scan to check the road in front of them is clear.
Listen for any traffic.
Then once safe to do so, step down take a straight line ahead to locate the kerb on the opposite side and step up.
Now ask the child to turn around and do the same to come straight back.
Inner shore line: outdoor
Scanning
Inner shore line: indoor
Going upstairs
Locate the first step and hold the handrail if there is one. Keep your feet still, extend your arm and keep the cane two steps ahead of you. Once the cane is two steps ahead, lift the cane slightly so that when you walk up the first step the cane will tap the edge of each step ahead of you. Once the cane swings free at the top, you know you have two steps left until you reach the top.
Going downstairs
Locate the first step, hold the handrail if there is one, then place your hand in the middle of your body and the cane will automatically be two steps ahead of you. When you walk down the first step, the cane will automatically drop down each step. Again, when the cane stops going over a stair and levels out, you still have two steps left. In this photo, Theo’s hand has dropped to his side but his cane is still coming into the middle of his body. It’s OK if it’s not 100%.
Long cane mobility skills for older children
Let’s keep this simple. Try walking outside home and practice the following skills:
Walk on the inner shore line
Walk on the mid line along the pavement
Use the outer shore line technique with a touch and drag, from the kerb edge to scan across in front of them and then back to the kerb edge.
Symbol cane mobility skills for any age
Get the young person to hold the symbol cane diagonally across their body.
Ask them to extend their arm slightly to keep the cane away from their body.
The symbol cane is generally not designed to touch the floor.
Contact us
If you need support, please get in contact with your relevant local team.
This website uses cookies to improve your experience. We'd also like to set optional analytics cookies to help us improve it. We won't set optional cookies unless you enable them by clicking the 'Accept' button. Cookie settingsACCEPT
Privacy & Cookies Policy
Our use of cookies
We use necessary cookies to make our website work. We'd also like to set optional analytics cookies to help us improve it. We won't set optional cookies unless you enable them by using the toggle button below. For more information on how these cookies work, please see our Privacy Policy page.
Necessary cookies enable core functionality such as security, network management and accessibility which are essential for the website to function properly. These cookies do not store any personal information. You may disable these by changing your browser settings, but this may affect how the website functions.